Software Development
The tutorial examples and code can be found in the following repositories:
Development Environment Setup
In this tutorial, we will use the VS Code extension for the ESP-IDF to develop applications for the ESP32-S3.
With VS Code, we can easily develop, debug, and deploy applications for the ESP32-S3. At the same time, we can also use other VS Code extensions help speed up the development process.
To get started, follow the steps below: 1. Install VS Code. 2. Install the ESP-IDF extension for VS Code. 3. Clone the ESP32-S3 repository. 4. Open the cloned repository in VS Code. 5. Set up the development environment.
Install VS Code
Download and install the latest version of VS Code from the official website: https://code.visualstudio.com/
Follow the installation instructions to complete the installation.
Install the ESP-IDF Extension for VS Code
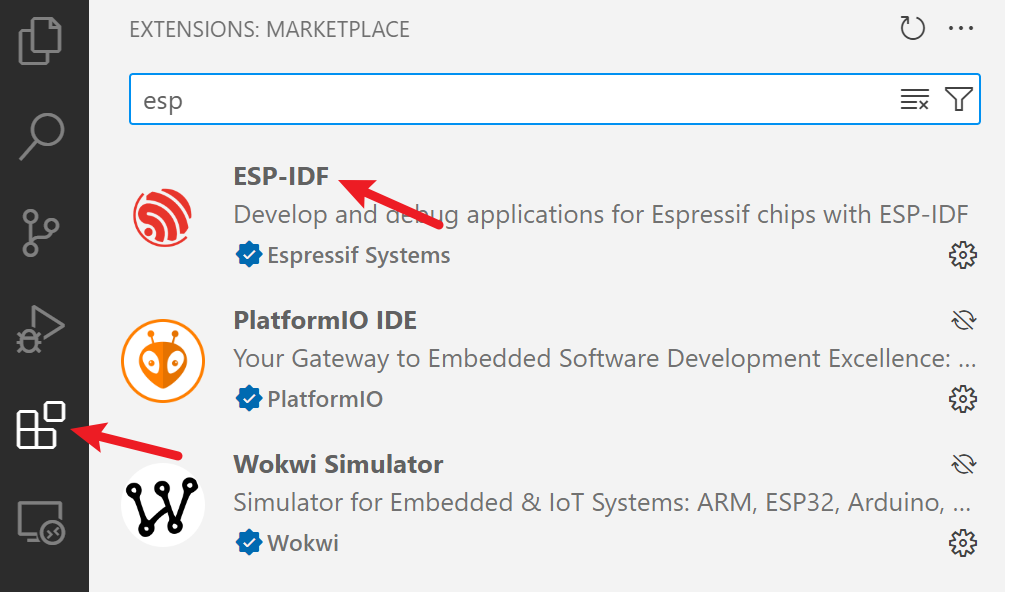
Open VS Code and go to the Extensions tab on the left side of the window. Search for "ESP-IDF" and install the "ESP-IDF extension for VS Code".
Configure the ESP-IDF Extension
After installing the ESP-IDF extension, you need to configure it to download the required tools and SDKs. Click the ESP-IDF extension icon on the left side of the VS Code window and select "Configure ESP-IDF extension".
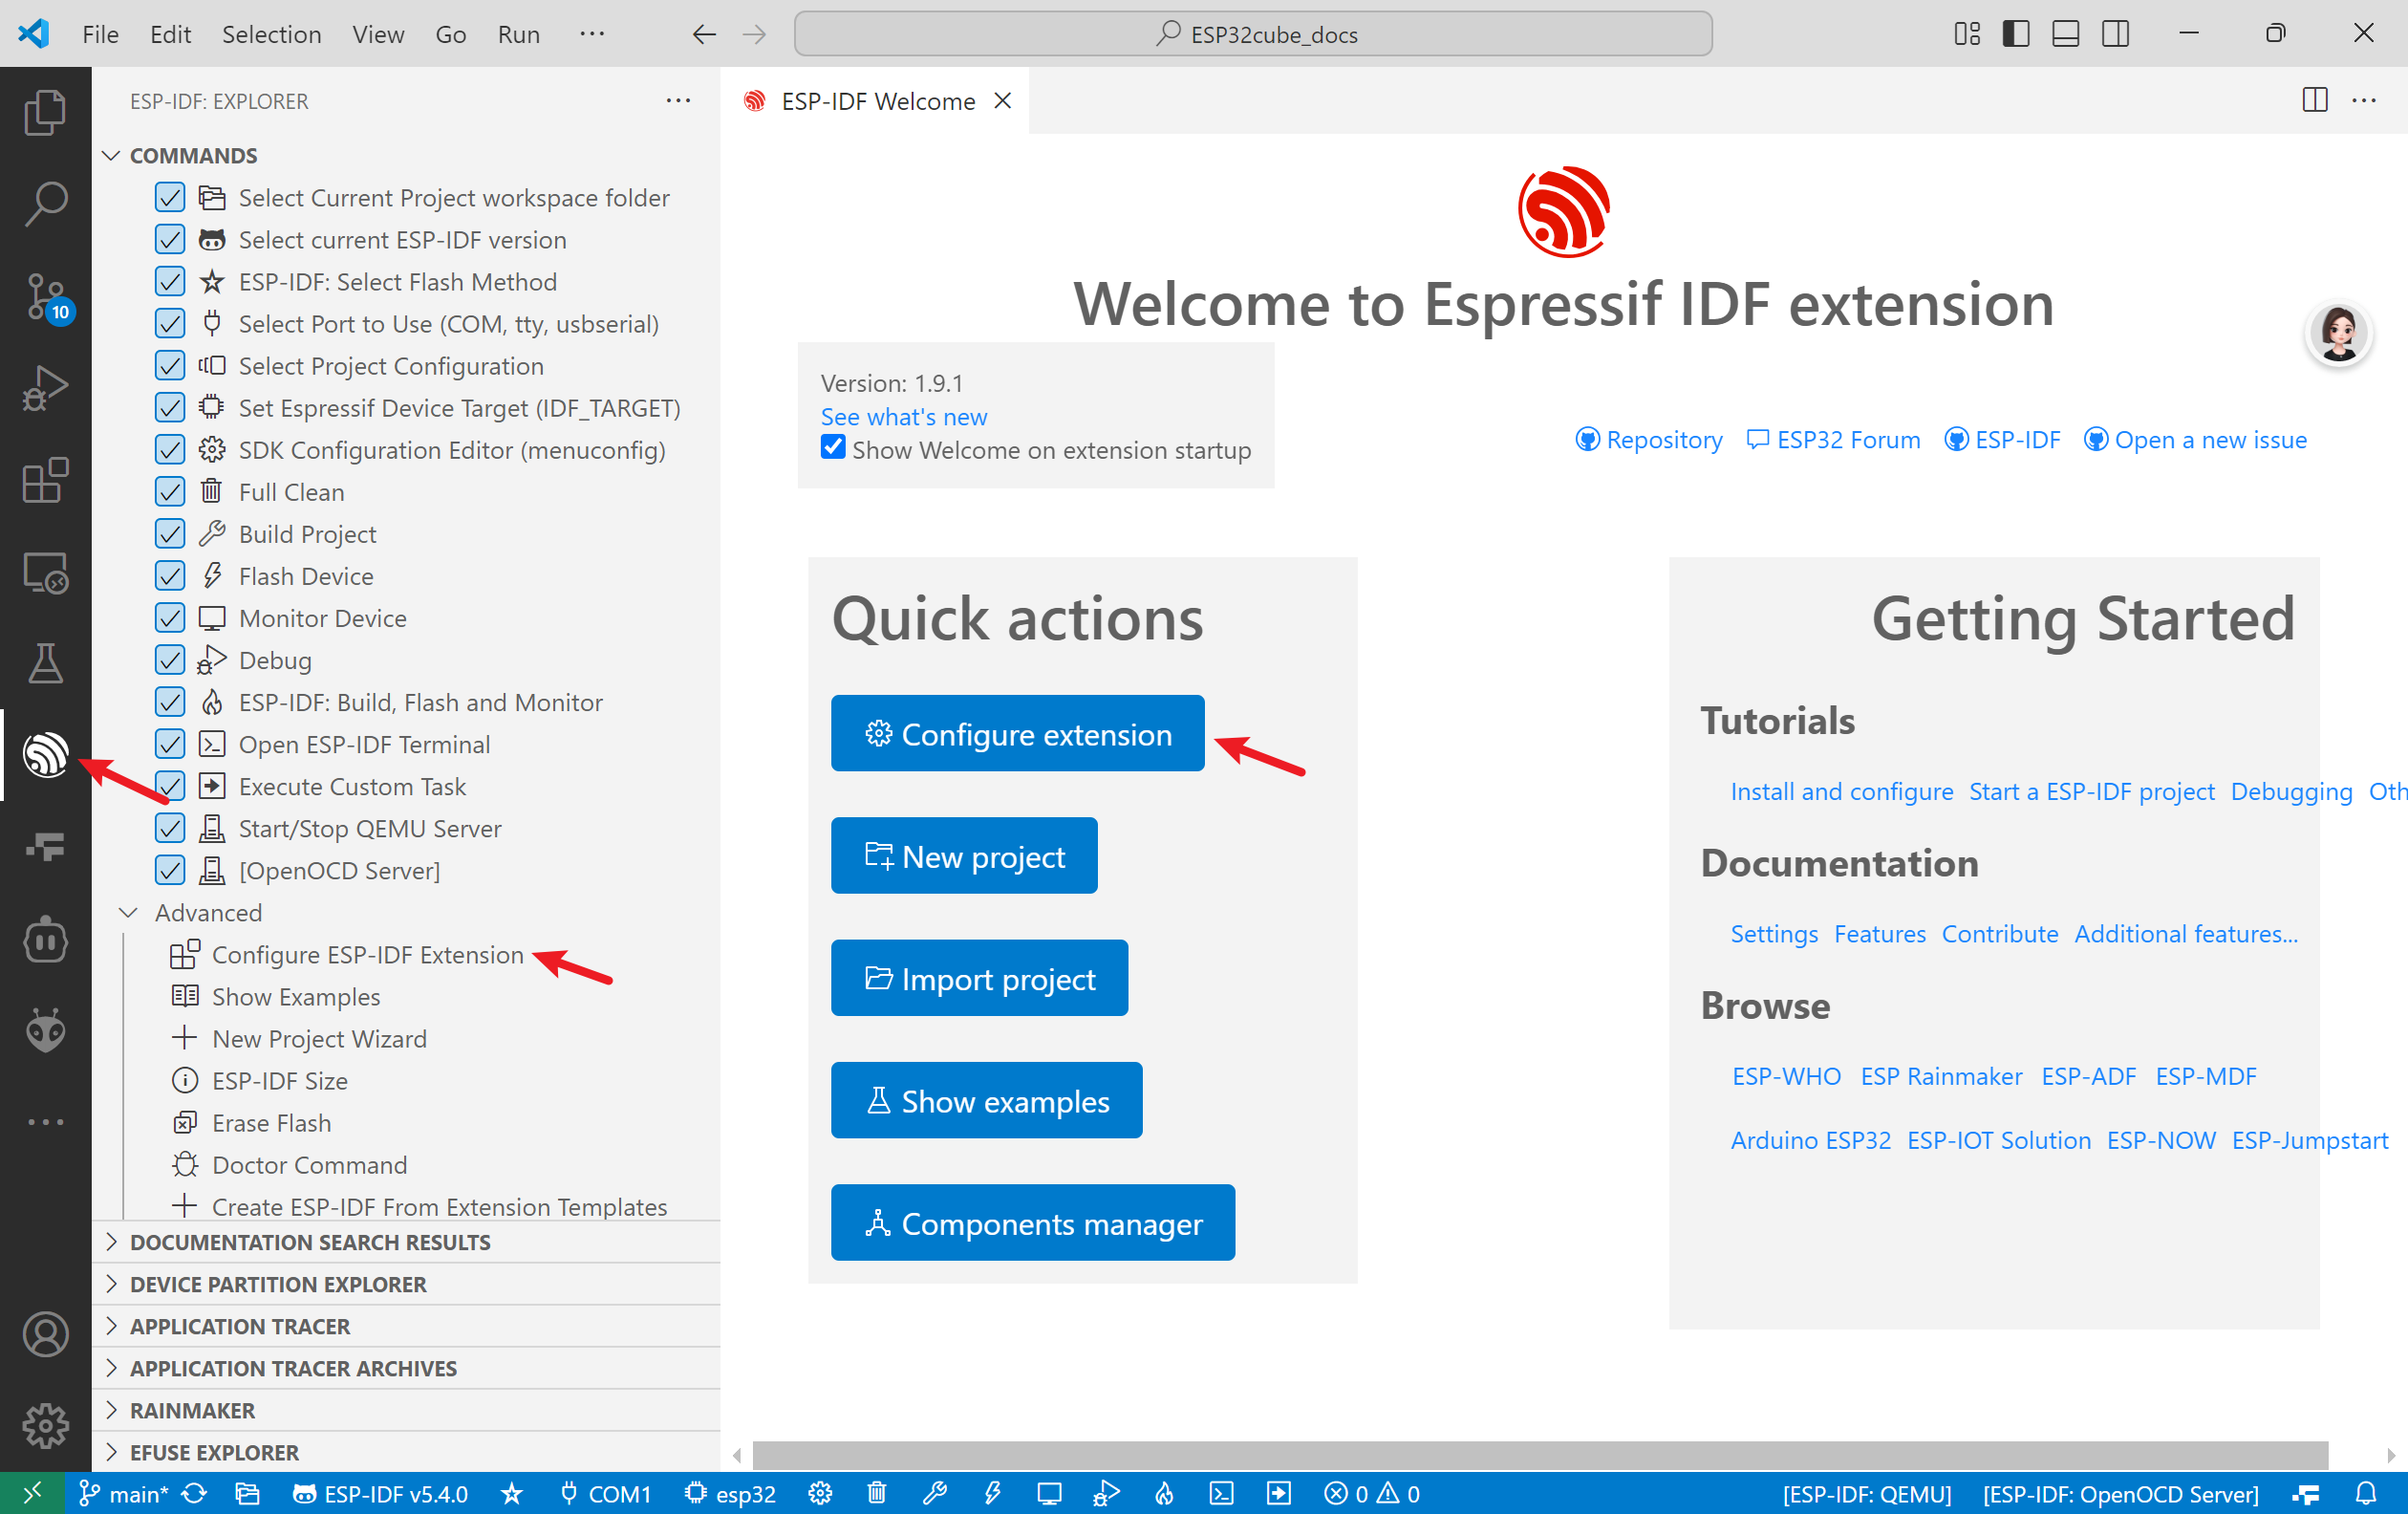
It will open a new tab in VS Code with the ESP-IDF extension configuration.
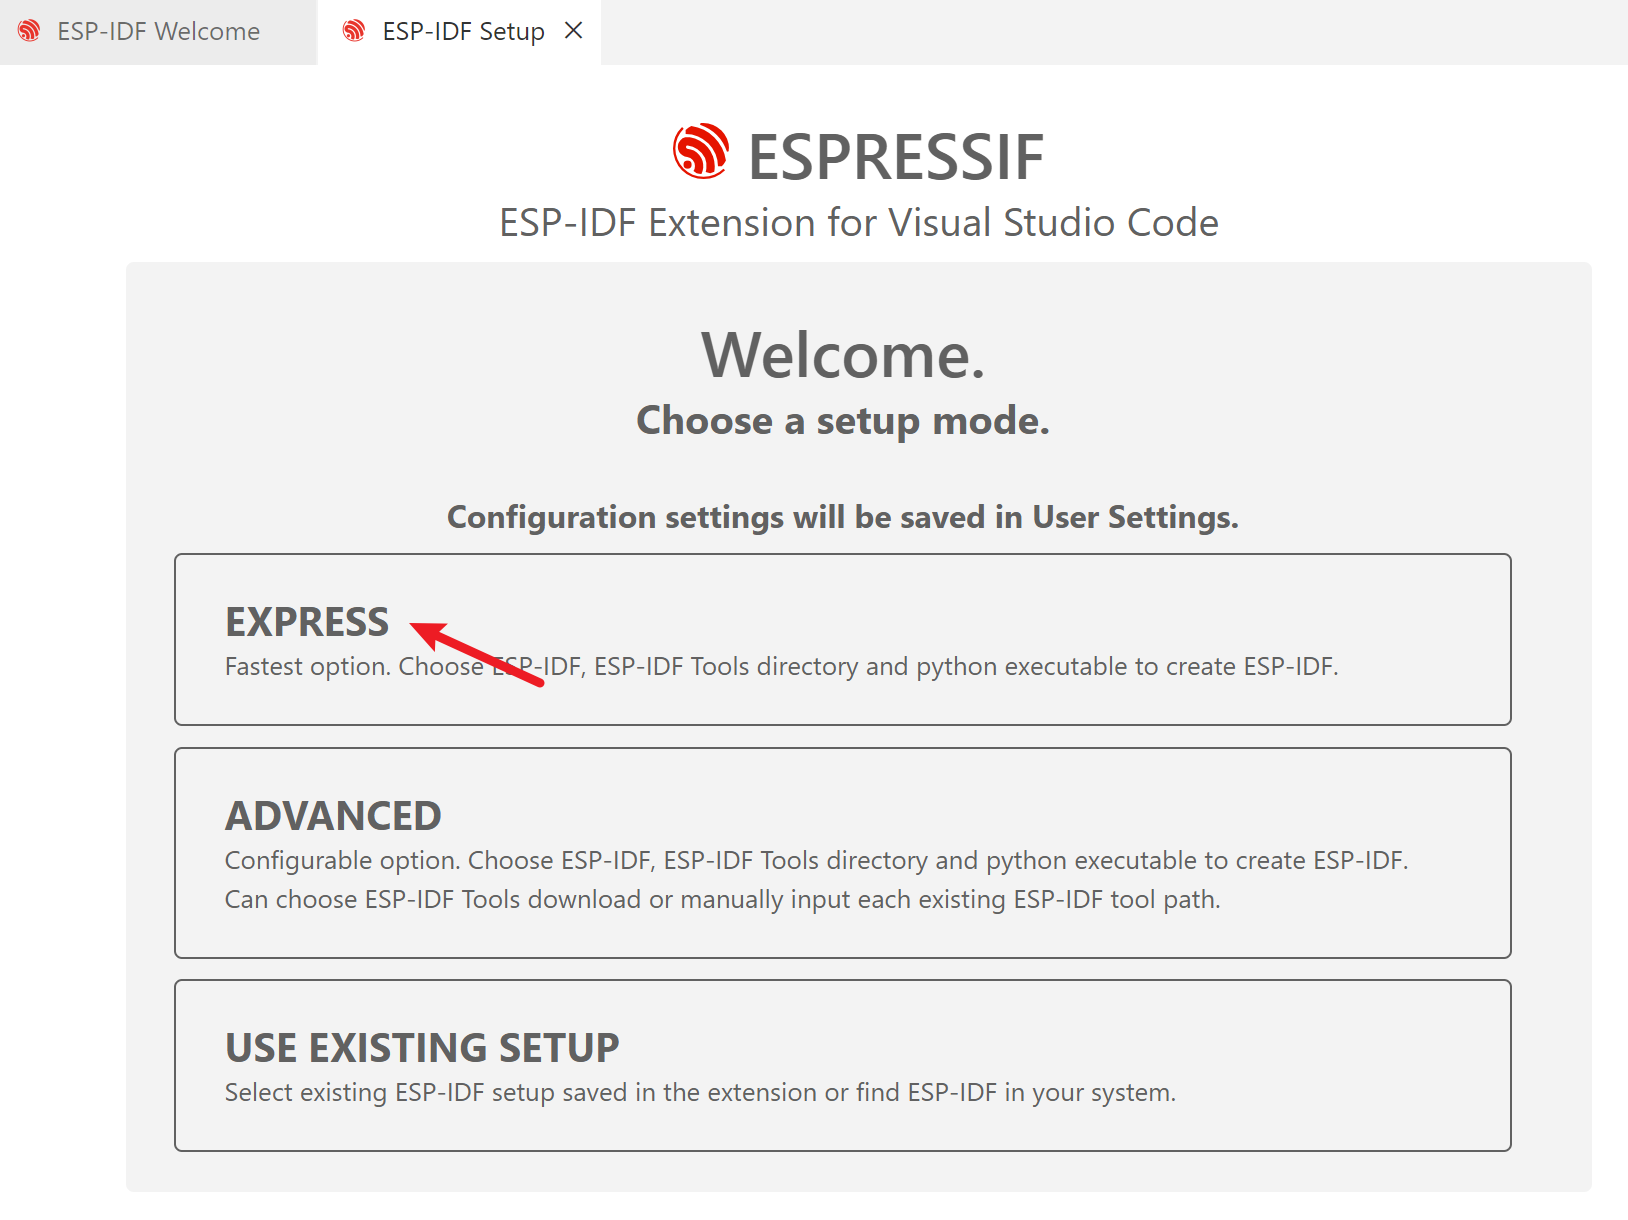
Click the "EXPRESS" option. It will open a new to configure the download source and file path settings.
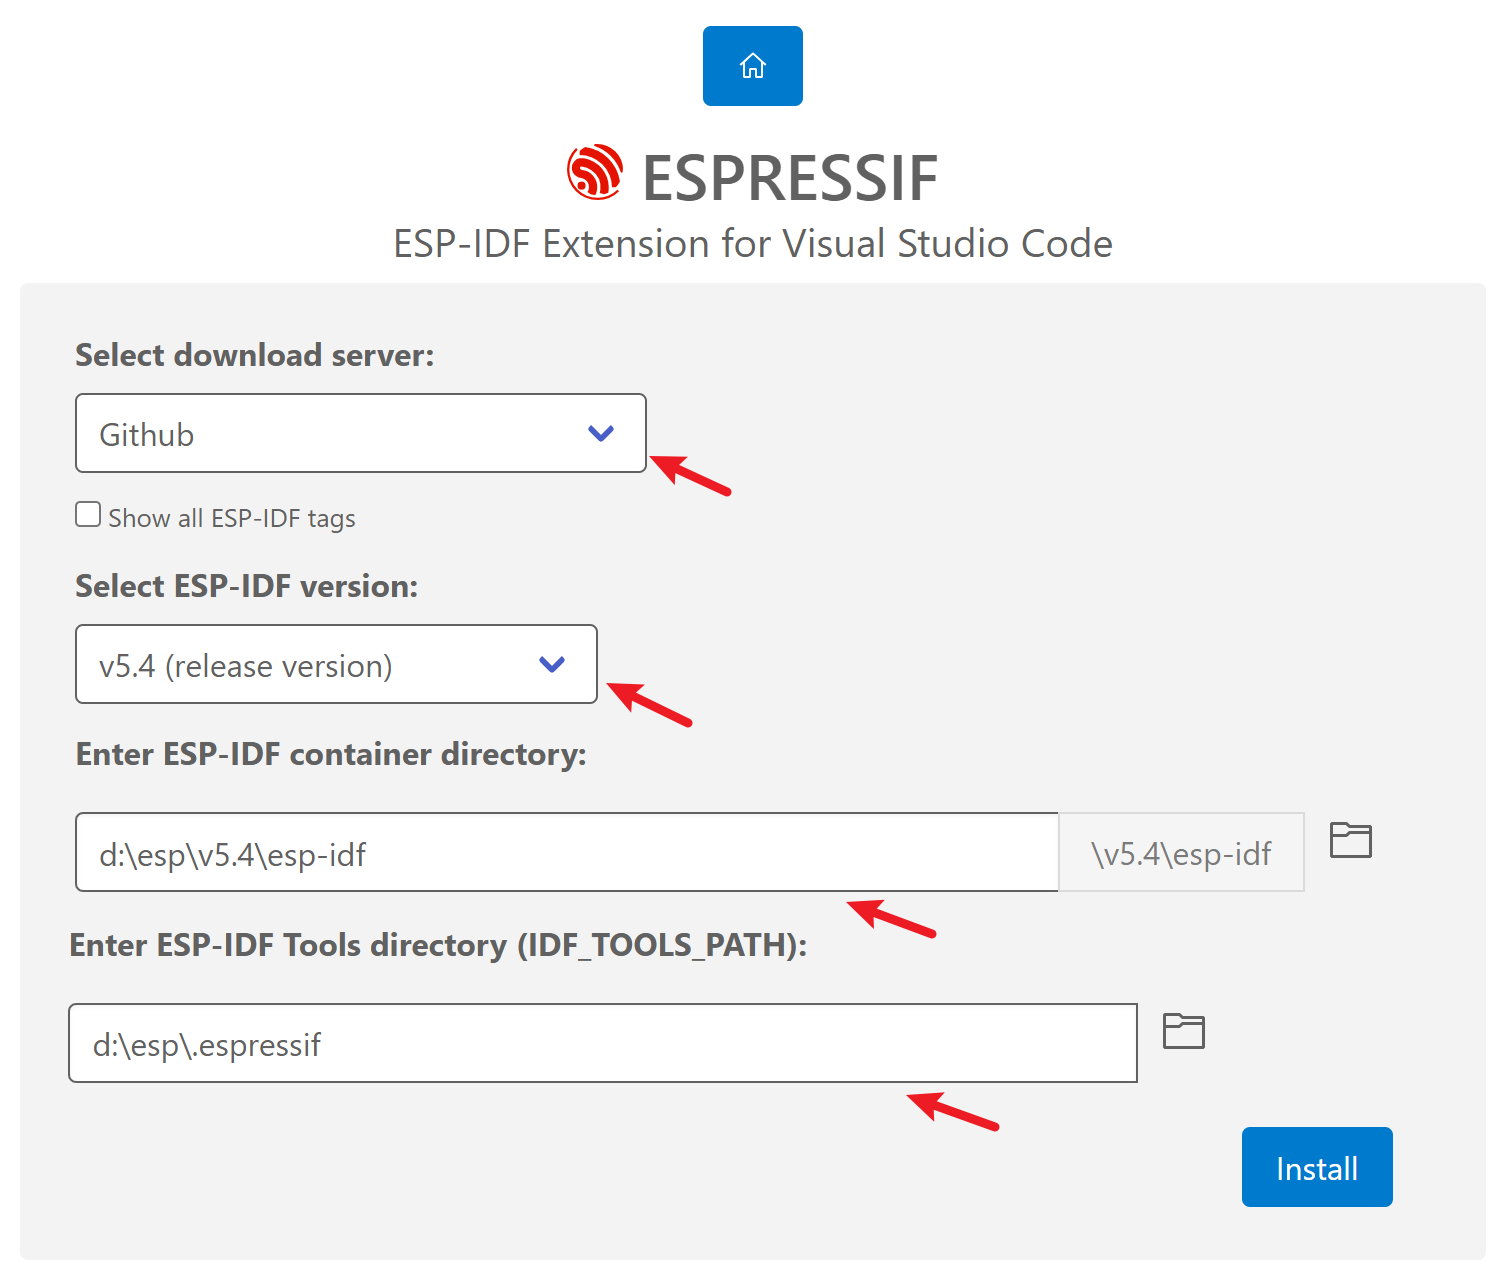
Click "Install" to download the required tools and SDKs.
It will take quite a long time to complete the download. Fortunately, it only needs to be done once.
ESP-IDF Extension Bottom Toolbar in VS Code
After installing the ESP-IDF Extension in VS Code, the bottom toolbar provides quick access to essential development tools. Below is a detailed explanation of each button’s functionality:

1. Select Target Chip (ESP-IDF: Device)
- Icon: 🎯
- Purpose: Choose the target ESP chip (e.g.,
esp32,esp32s3,esp32c3). - Usage:
- Click to open a dropdown list of supported ESP chips.
- Select the chip matching your hardware (e.g.,
esp32s3for ESP32-S3 boards).
2. Select COM Port (ESP-IDF: Port)
- Icon: 🔌
- Purpose: Choose the serial port connected to your ESP device.
- Usage:
- Click to list available COM ports (e.g.,
COM3,/dev/ttyUSB0). - Select the port your ESP board is connected to.
3. Set Build Target (ESP-IDF: Build Target)
- Icon: 🛠️
- Purpose: Configure project-specific build settings (e.g., flash size, partition scheme).
- Usage:
- Opens
menuconfiginterface to adjust settings like Wi-Fi stack, Bluetooth, or peripheral configurations.
4. Clean Project (ESP-IDF: Clean)
- Icon: 🗑️
- Purpose: Delete build artifacts and start a fresh compilation.
- Usage:
- Click to clean the
builddirectory. Useful after major code changes or configuration updates.
5. Build Project (ESP-IDF: Build)
- Icon: ⚙️
- Purpose: Compile the project source code into firmware binaries.
- Usage:
- Click to start compilation. Output logs appear in the terminal.
6. Flash Firmware (ESP-IDF: Flash)
- Icon: ⚡
- Purpose: Upload the compiled firmware to the ESP device.
- Usage:
- Ensure the correct COM port and target chip are selected.
- Click to flash the
.binfiles to the device.
7. Open Serial Monitor (ESP-IDF: Monitor)
- Icon: 📺
- Purpose: View real-time serial output (debug logs, printf statements).
- Usage:
- Opens a terminal window to display logs from the ESP device.
- Supports sending commands to the device (if configured).
8. One-Click Build+Flash+Monitor (ESP-IDF: Build, Flash and Monitor)
- Icon: 🔥
- Purpose: Automate compilation, flashing, and serial monitoring in one step.
- Usage:
- Click to sequentially:
- Build the project.
- Flash the firmware.
- Open the serial monitor.
9. Select ESP-IDF Version (ESP-IDF: SDK Version)
- Icon: 📦
- Purpose: Switch between installed ESP-IDF framework versions.
- Usage:
- Click to choose a version (e.g.,
v5.1.2,v5.2.1). - Required for compatibility with specific projects or libraries.
10. Task Manager (ESP-IDF: Task)
- Icon: 📋
- Purpose: View and manage active ESP-IDF tasks (e.g., build, flash jobs).
- Usage:
- Click to see running processes or cancel tasks.
Example Workflow
- Select Target: Choose
esp32s3. - Select COM Port: Pick the connected port (e.g.,
COM4). - Configure: Adjust settings via
menuconfigif needed. - Build: Compile the code.
- Flash: Upload firmware to the board.
- Monitor: Debug logs in real time.
Notes
- Dependencies: Ensure drivers (e.g., CH340 for USB-UART) and ESP-IDF tools are installed.
- Shortcuts: Many buttons have keyboard shortcuts (hover over icons for tooltips).
This toolbar streamlines ESP32 development by integrating critical tasks into a single interface, reducing context switching between tools.