AI Chat
This guide provides instructions for flashing the Xiaozhi AI terminal firmware to your development board.
Download Firmware
Download the latest firmware from GitHub: Release Page:
https://github.com/78/xiaozhi-esp32/releases
Download the zip file named: vx.x.x_lichuang-dev.zip
Extract the merged-binary.bin file from the zip package.
Flash Firmware to Development Board
Online Flashing Tool:
https://espressif.github.io/esp-launchpad/
-
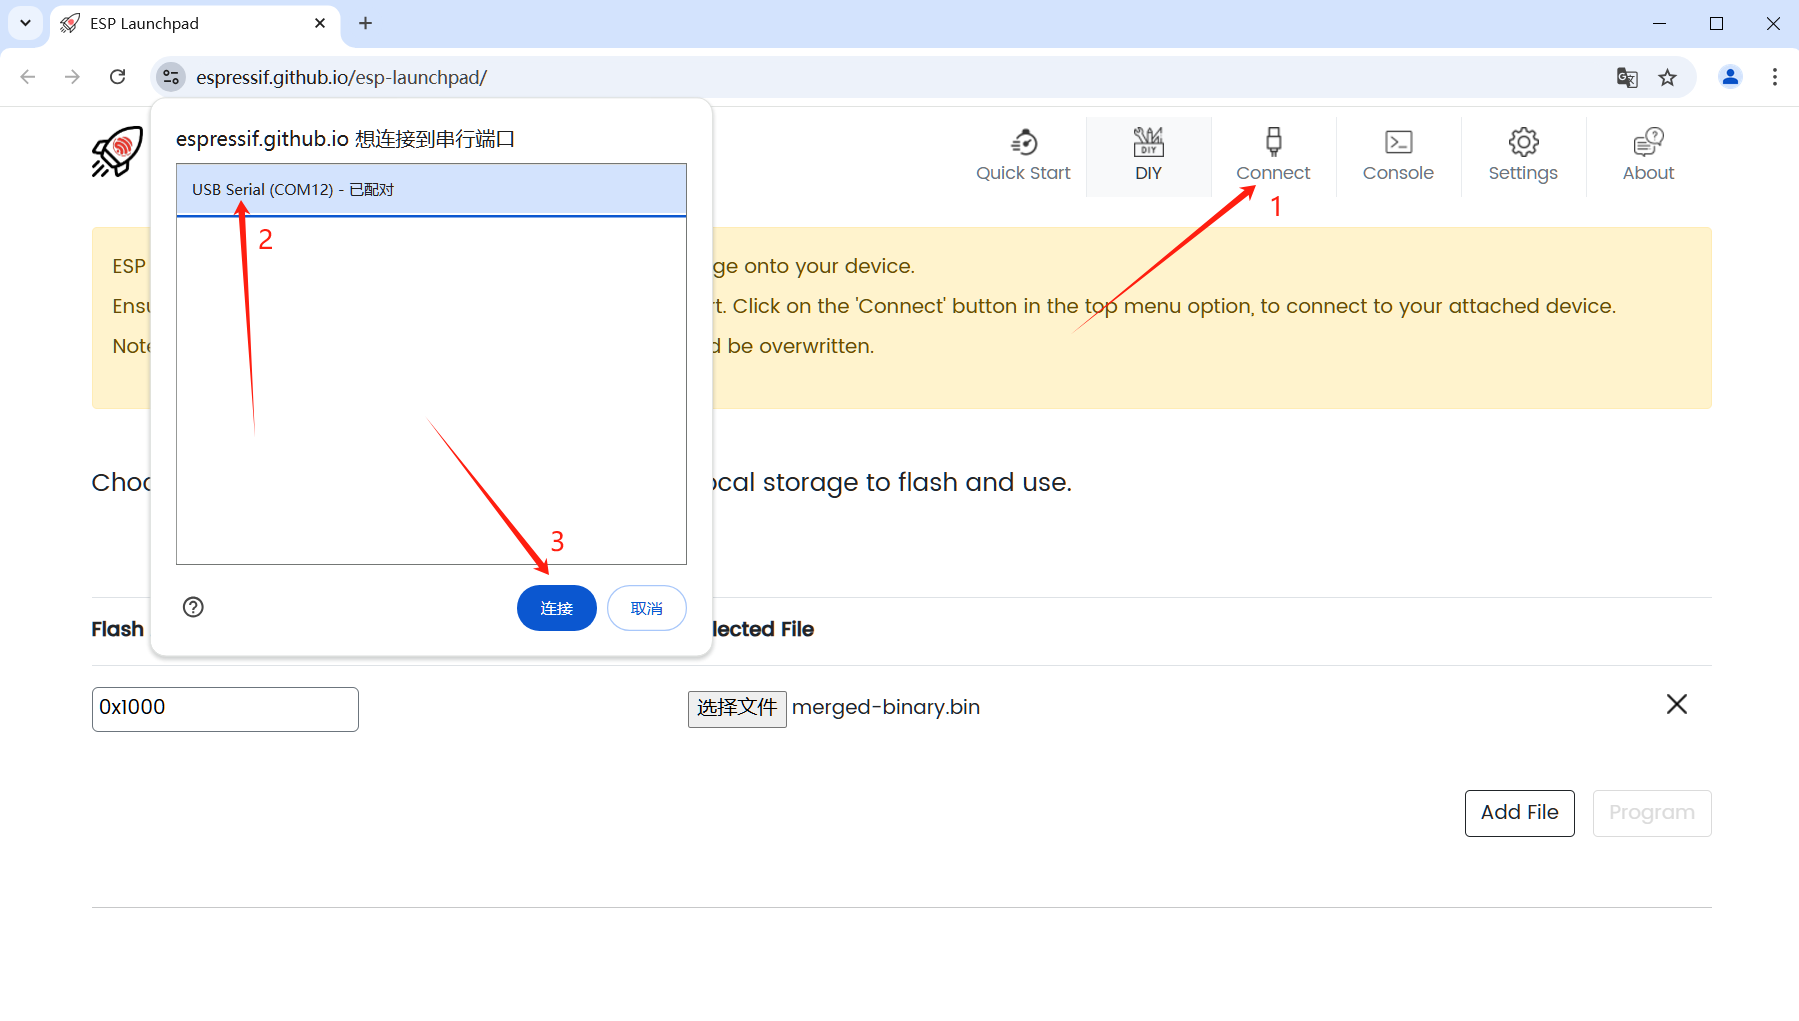
Click the Connect menu in the top right corner of the DIY page (position 1).
-
In the popup window, select your development board's COM port (e.g., USB Serial (COM12) - Paired). Note that the COM port number may vary depending on your device.
-
Click the Connect button to authorize. This allows the website to access your development board's COM port.
- Verify the Connection
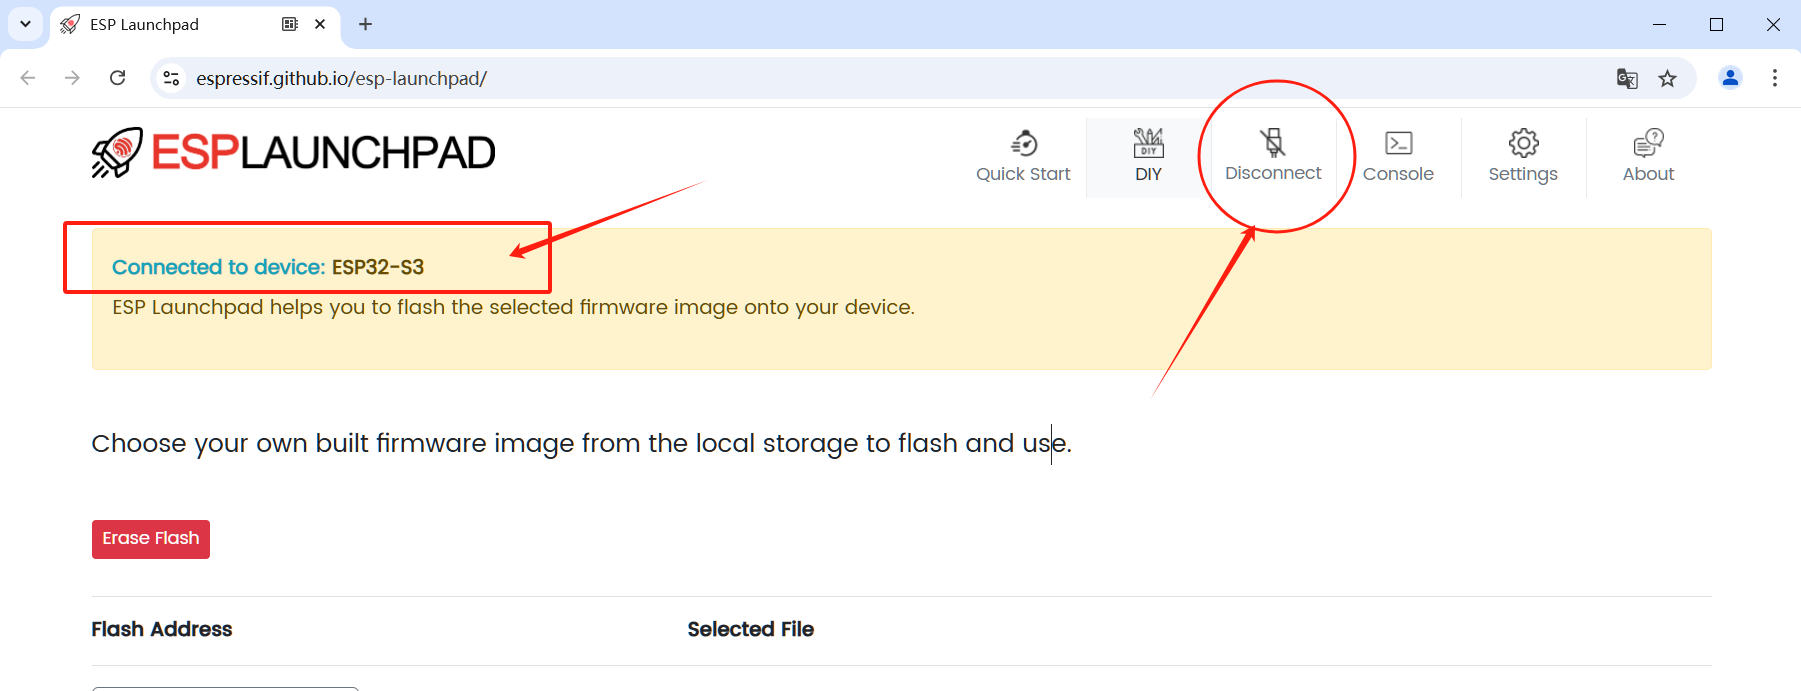
After connecting, you'll see "Connected to device: ESP32-S3" on the webpage, and the Connect menu will change to Disconnect, indicating a successful connection.
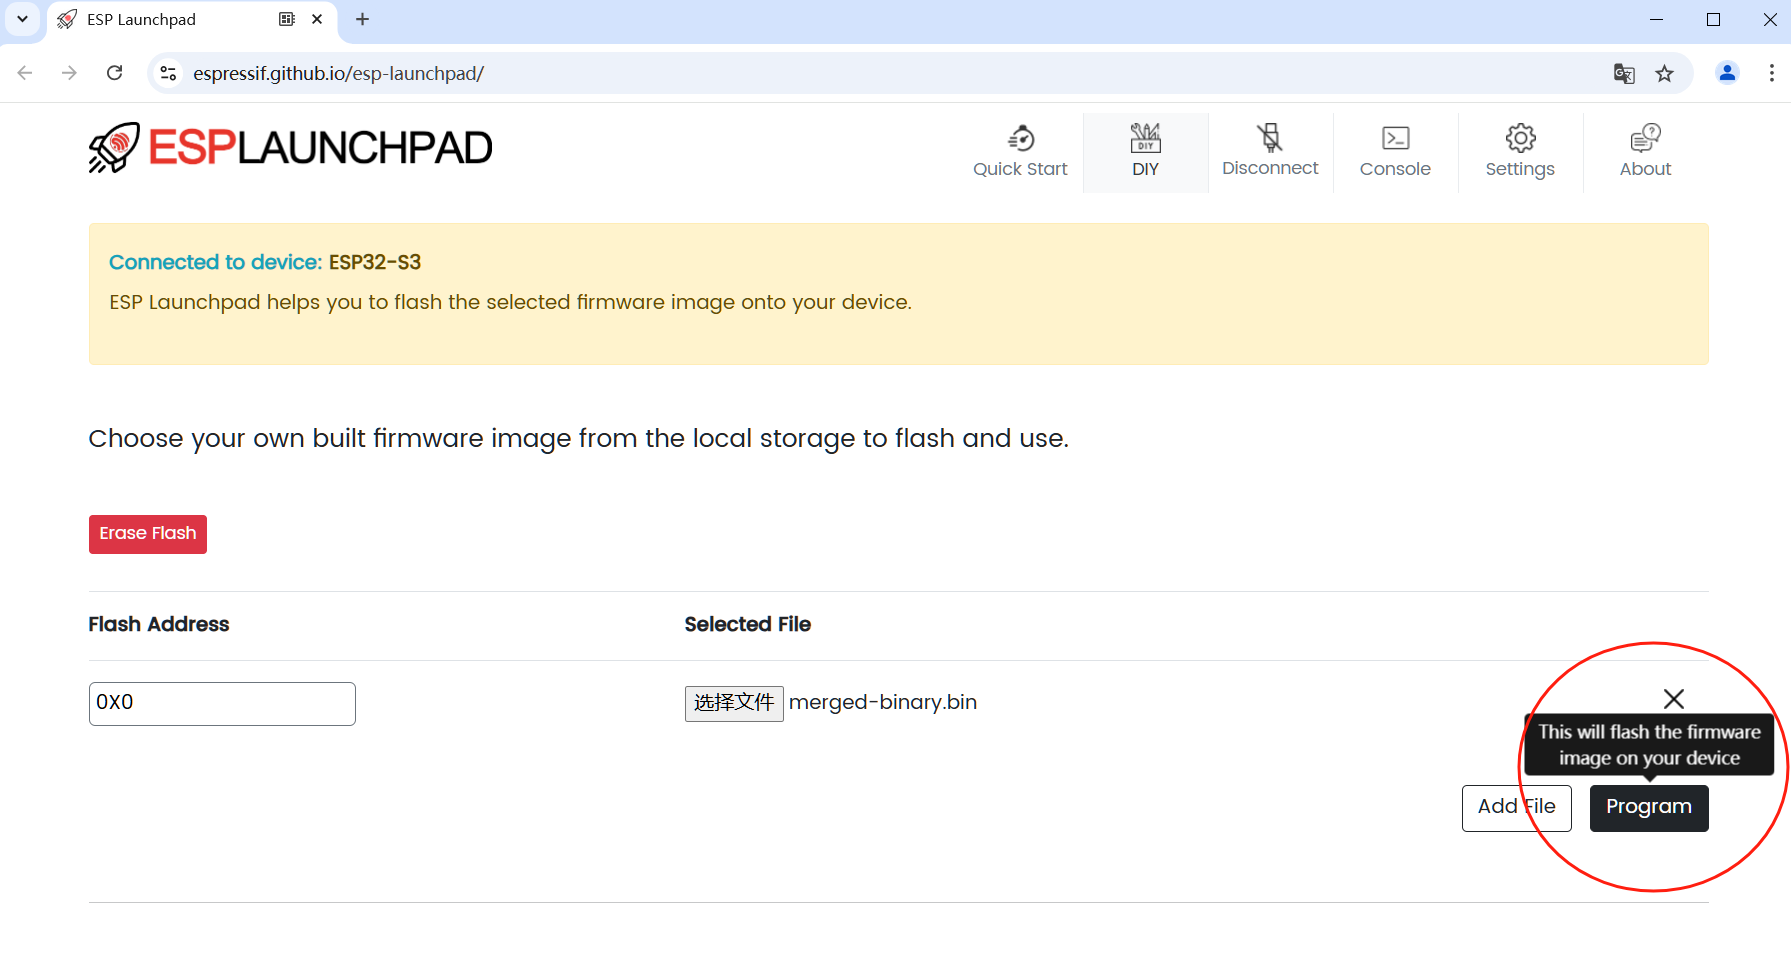
Load and Configure the BIN Firmware
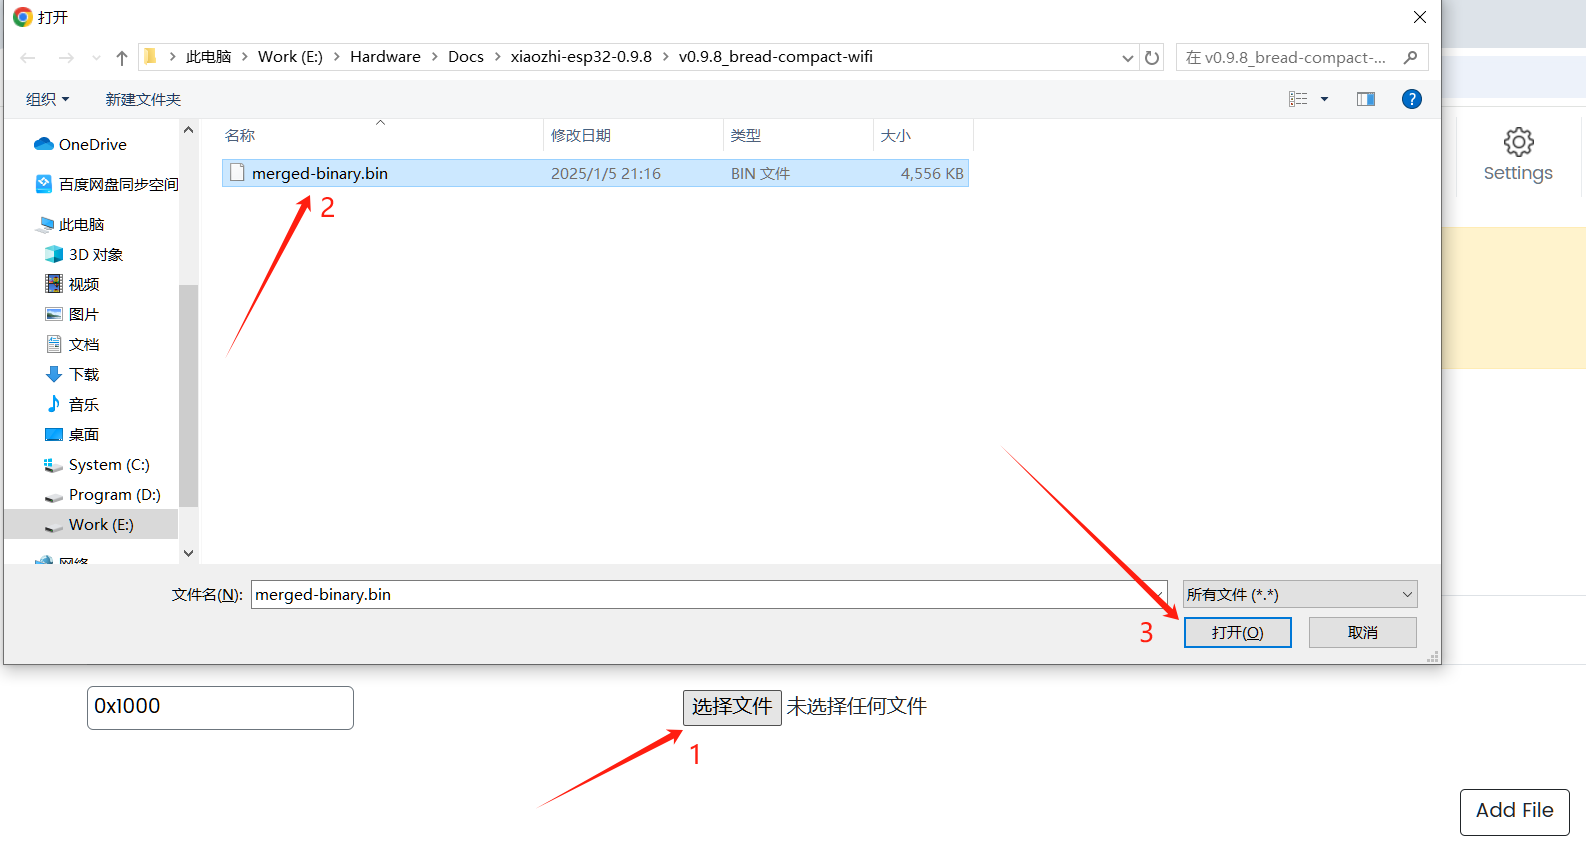
- Load the BIN file
Click the Choose File button in the middle of the DIY page (position 1), navigate to your firmware folder, select the bin file (position 2), and click Open (position 3) to load the firmware.
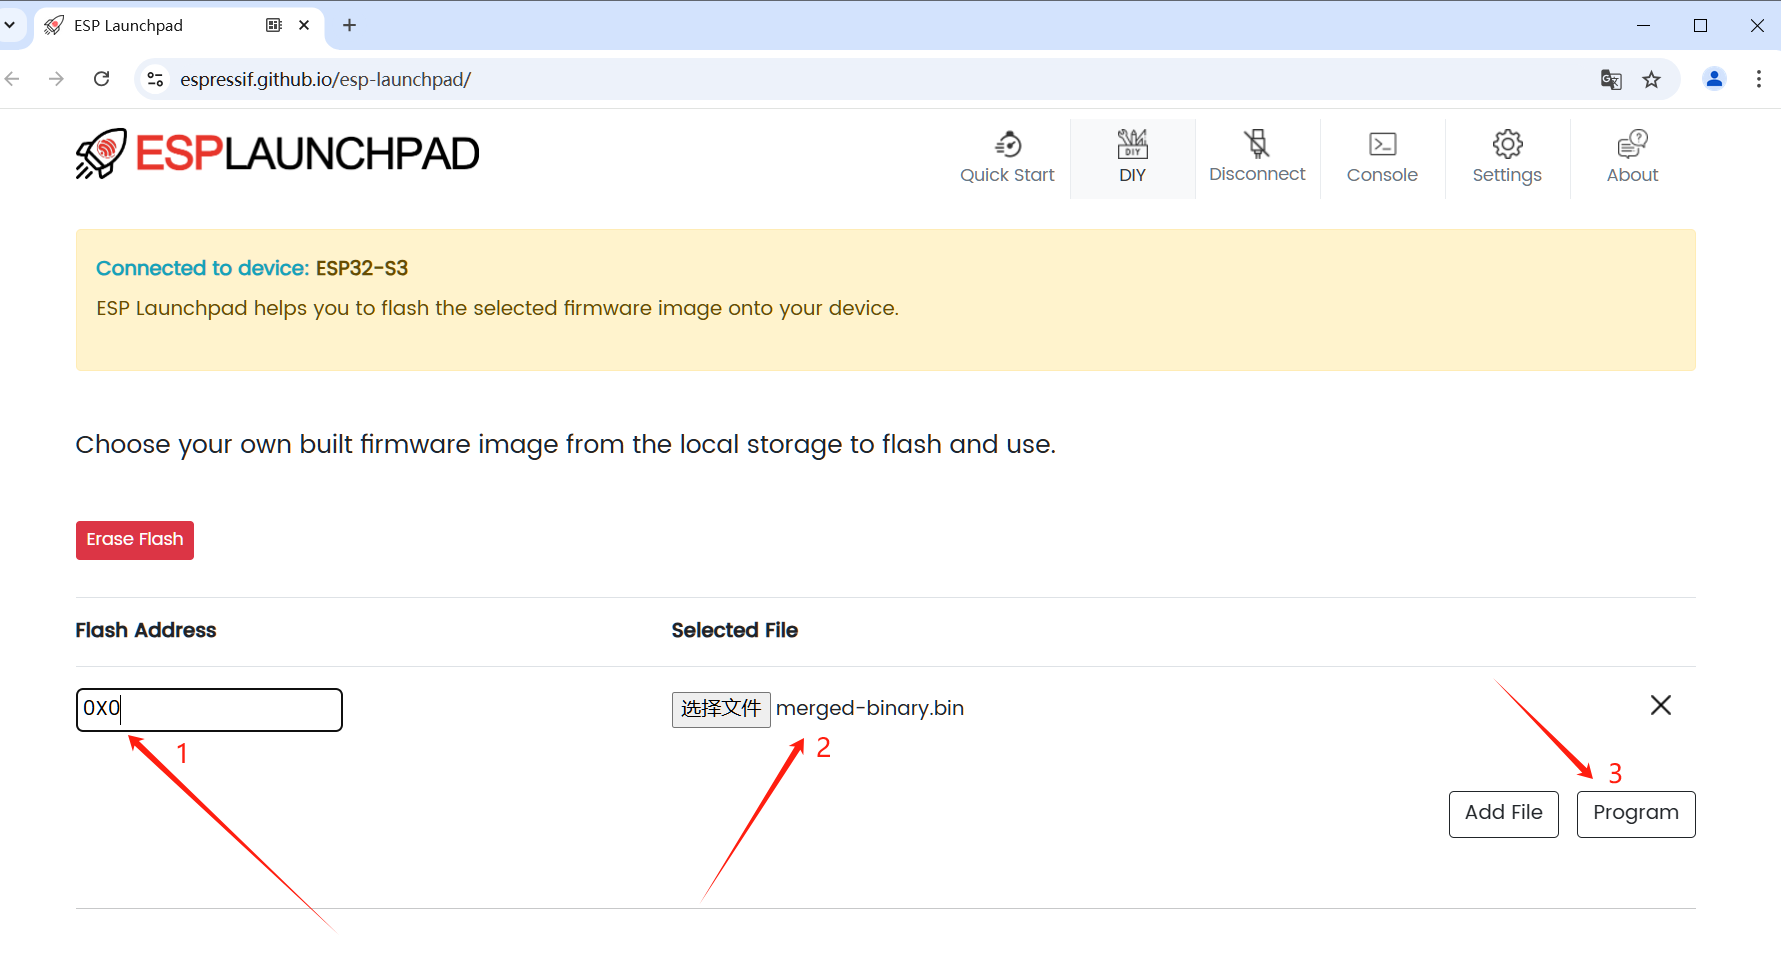
- Set Flash Address
Enter 0x0 or 0 in the Flash Address input box (position 1). Make sure you can see the loaded bin file at position 2. If not, try importing it again following step 1.
Since the Xiaozhi AI firmware is already merged into a single bin file (merged-binary.bin), no additional bin files are needed.
Flash the Firmware and Verify
- Start Flashing
Click the Program button (position 3) to start flashing the firmware to your device.
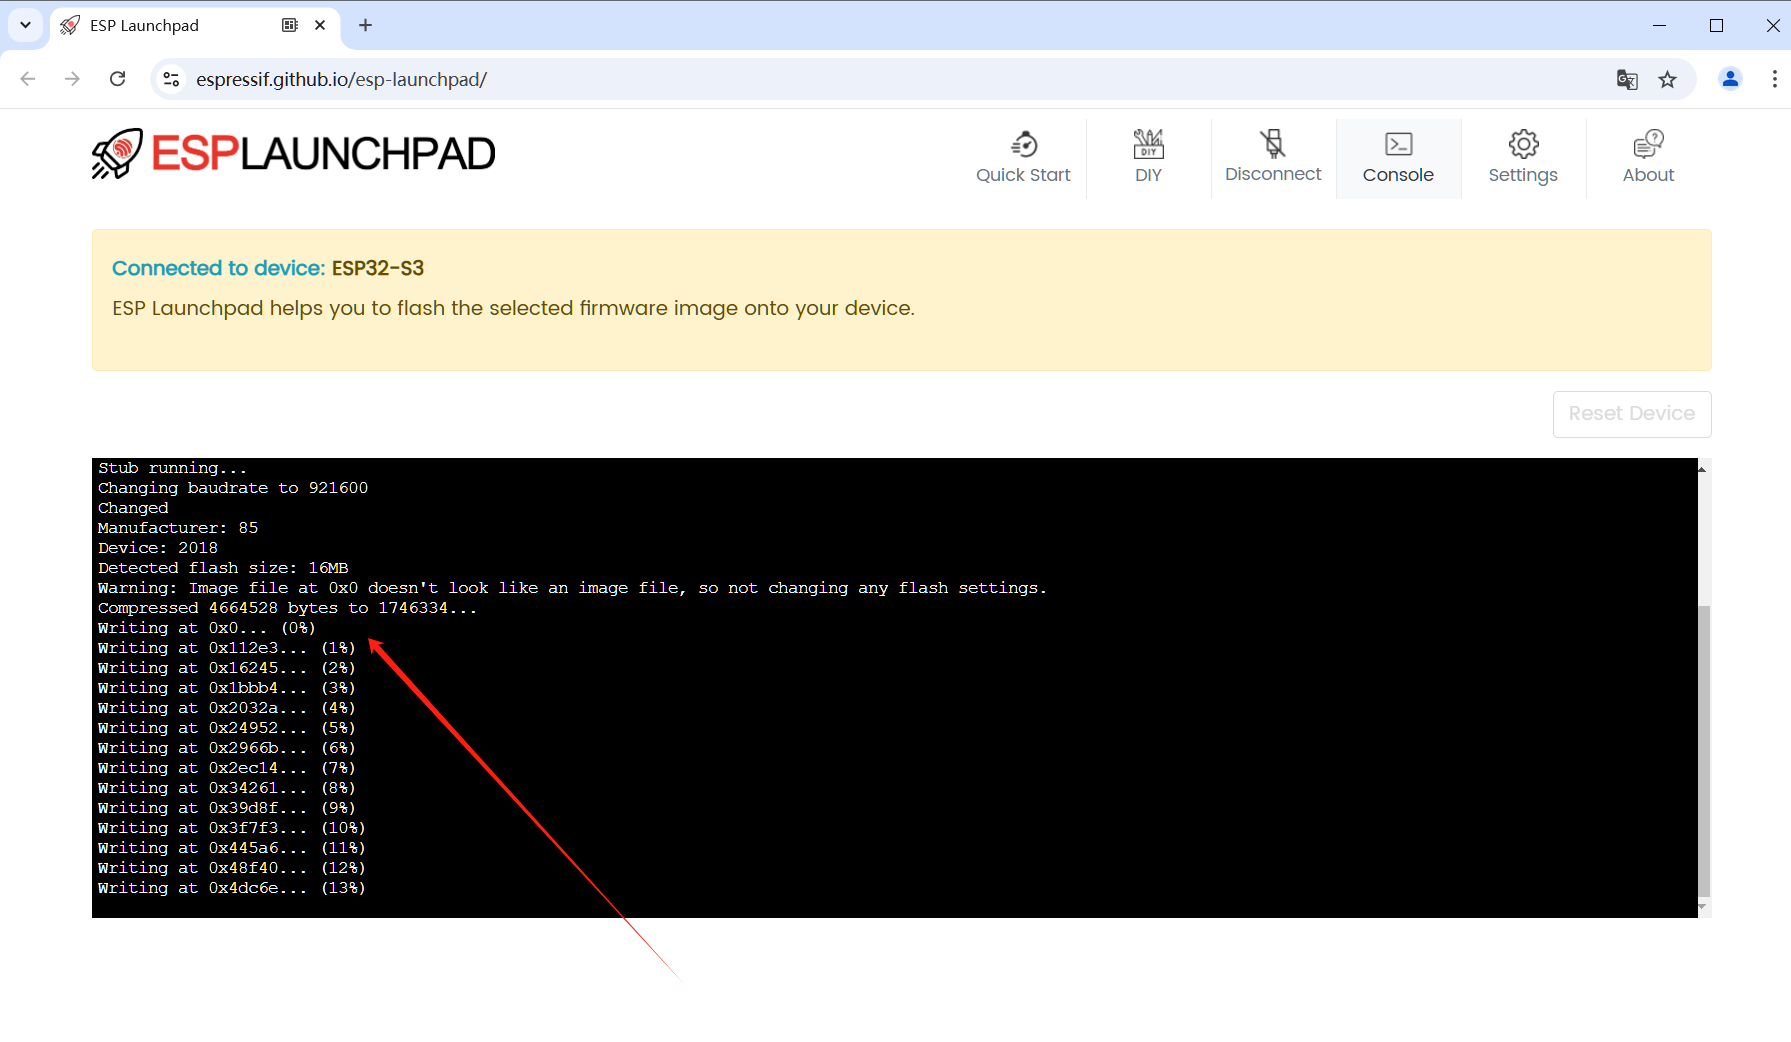
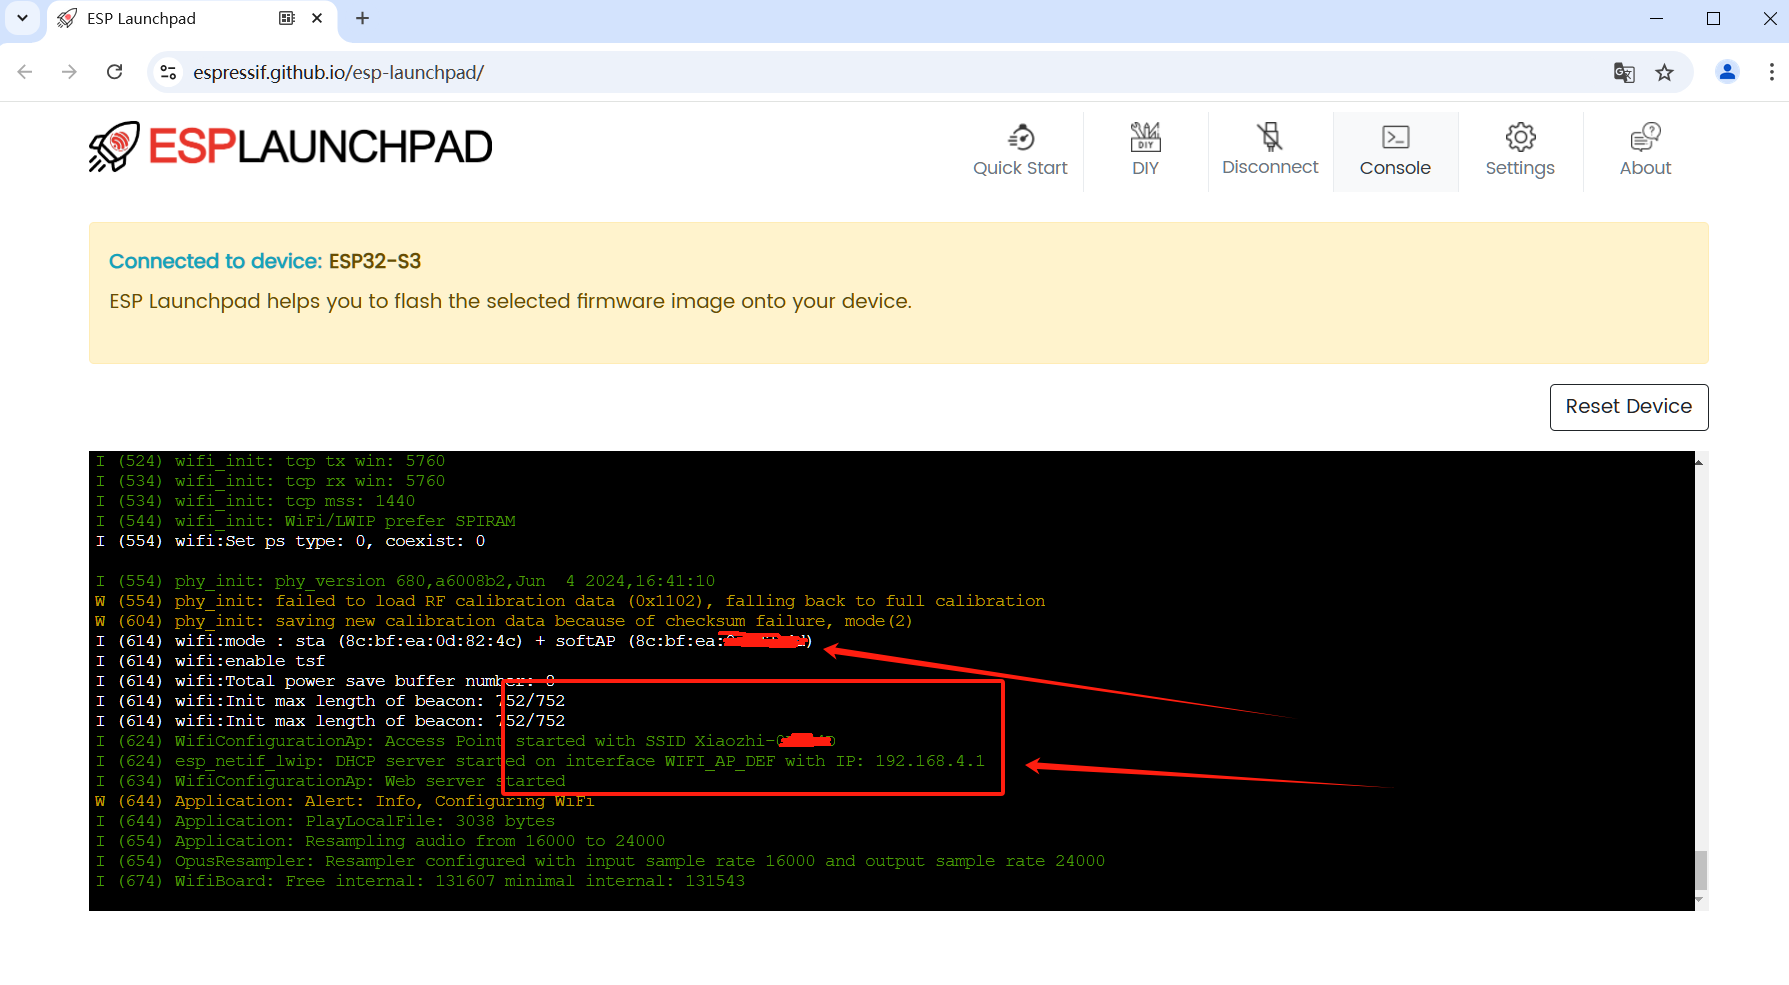
- Monitor Progress
The page will automatically switch to the Console tab, showing the flashing progress:
- Complete Flashing and Restart
When Flashing is Complete: Once you see "100% complete" and "Leaving..." in the console, click the restart device button to reboot the development board.
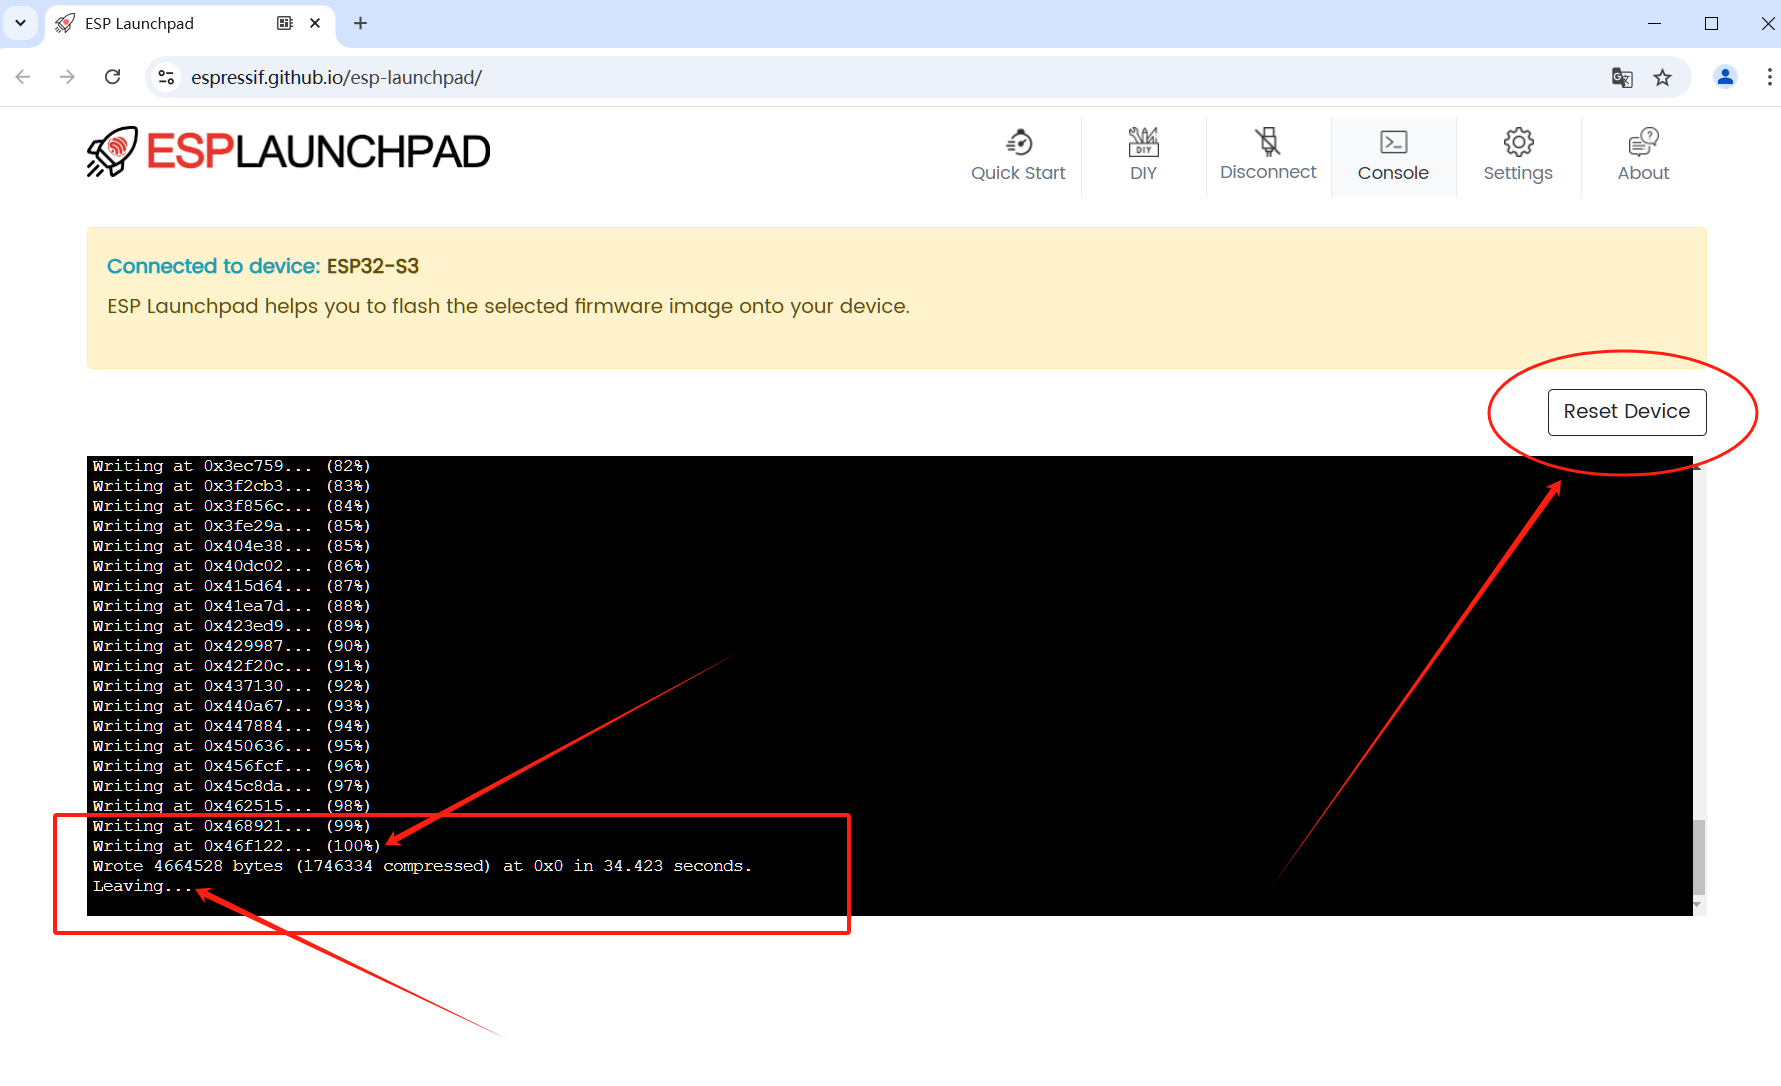
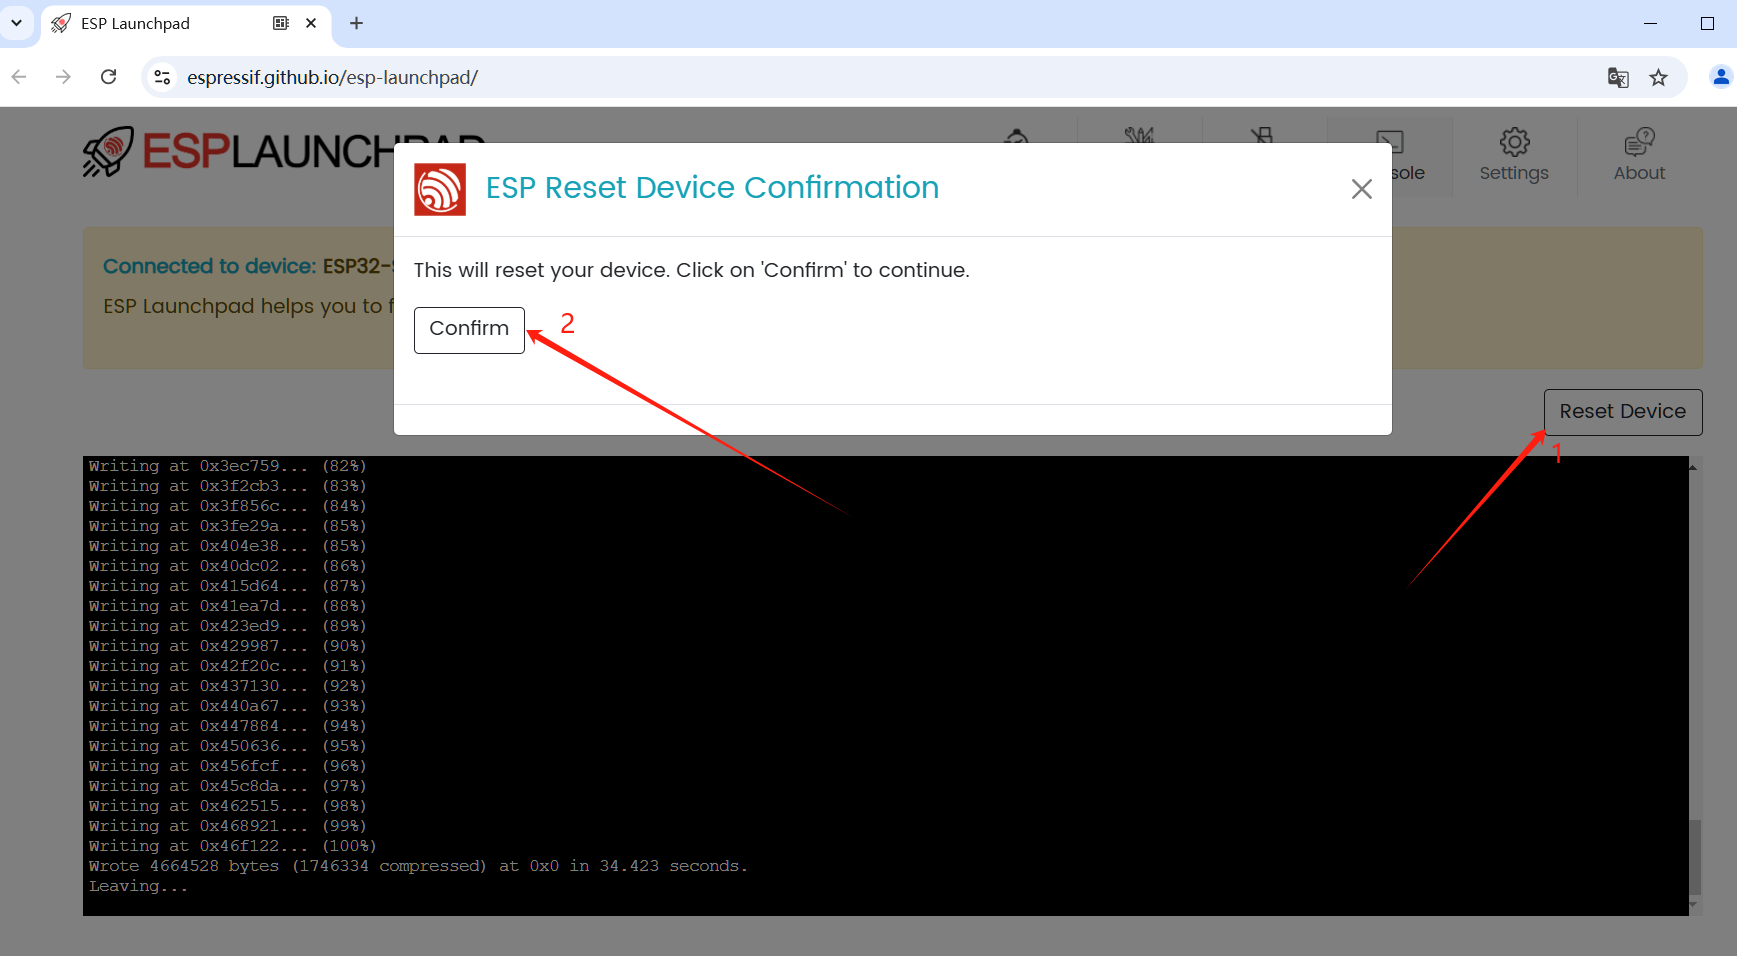
Restart the Device: After flashing, the device won't restart automatically. Click the Reset Device button (position 1) and confirm by clicking the Confirm button (position 2) to restart the board and run the newly flashed firmware.
Verify Normal Operation: After restarting, the console will display the Xiaozhi AI terminal firmware's serial logs. When you see the network card address and WiFi configuration prompts, it indicates successful flashing.
Network Configuration
After flashing the firmware, keep the device powered on. It will enter network configuration mode.
Configuration Steps
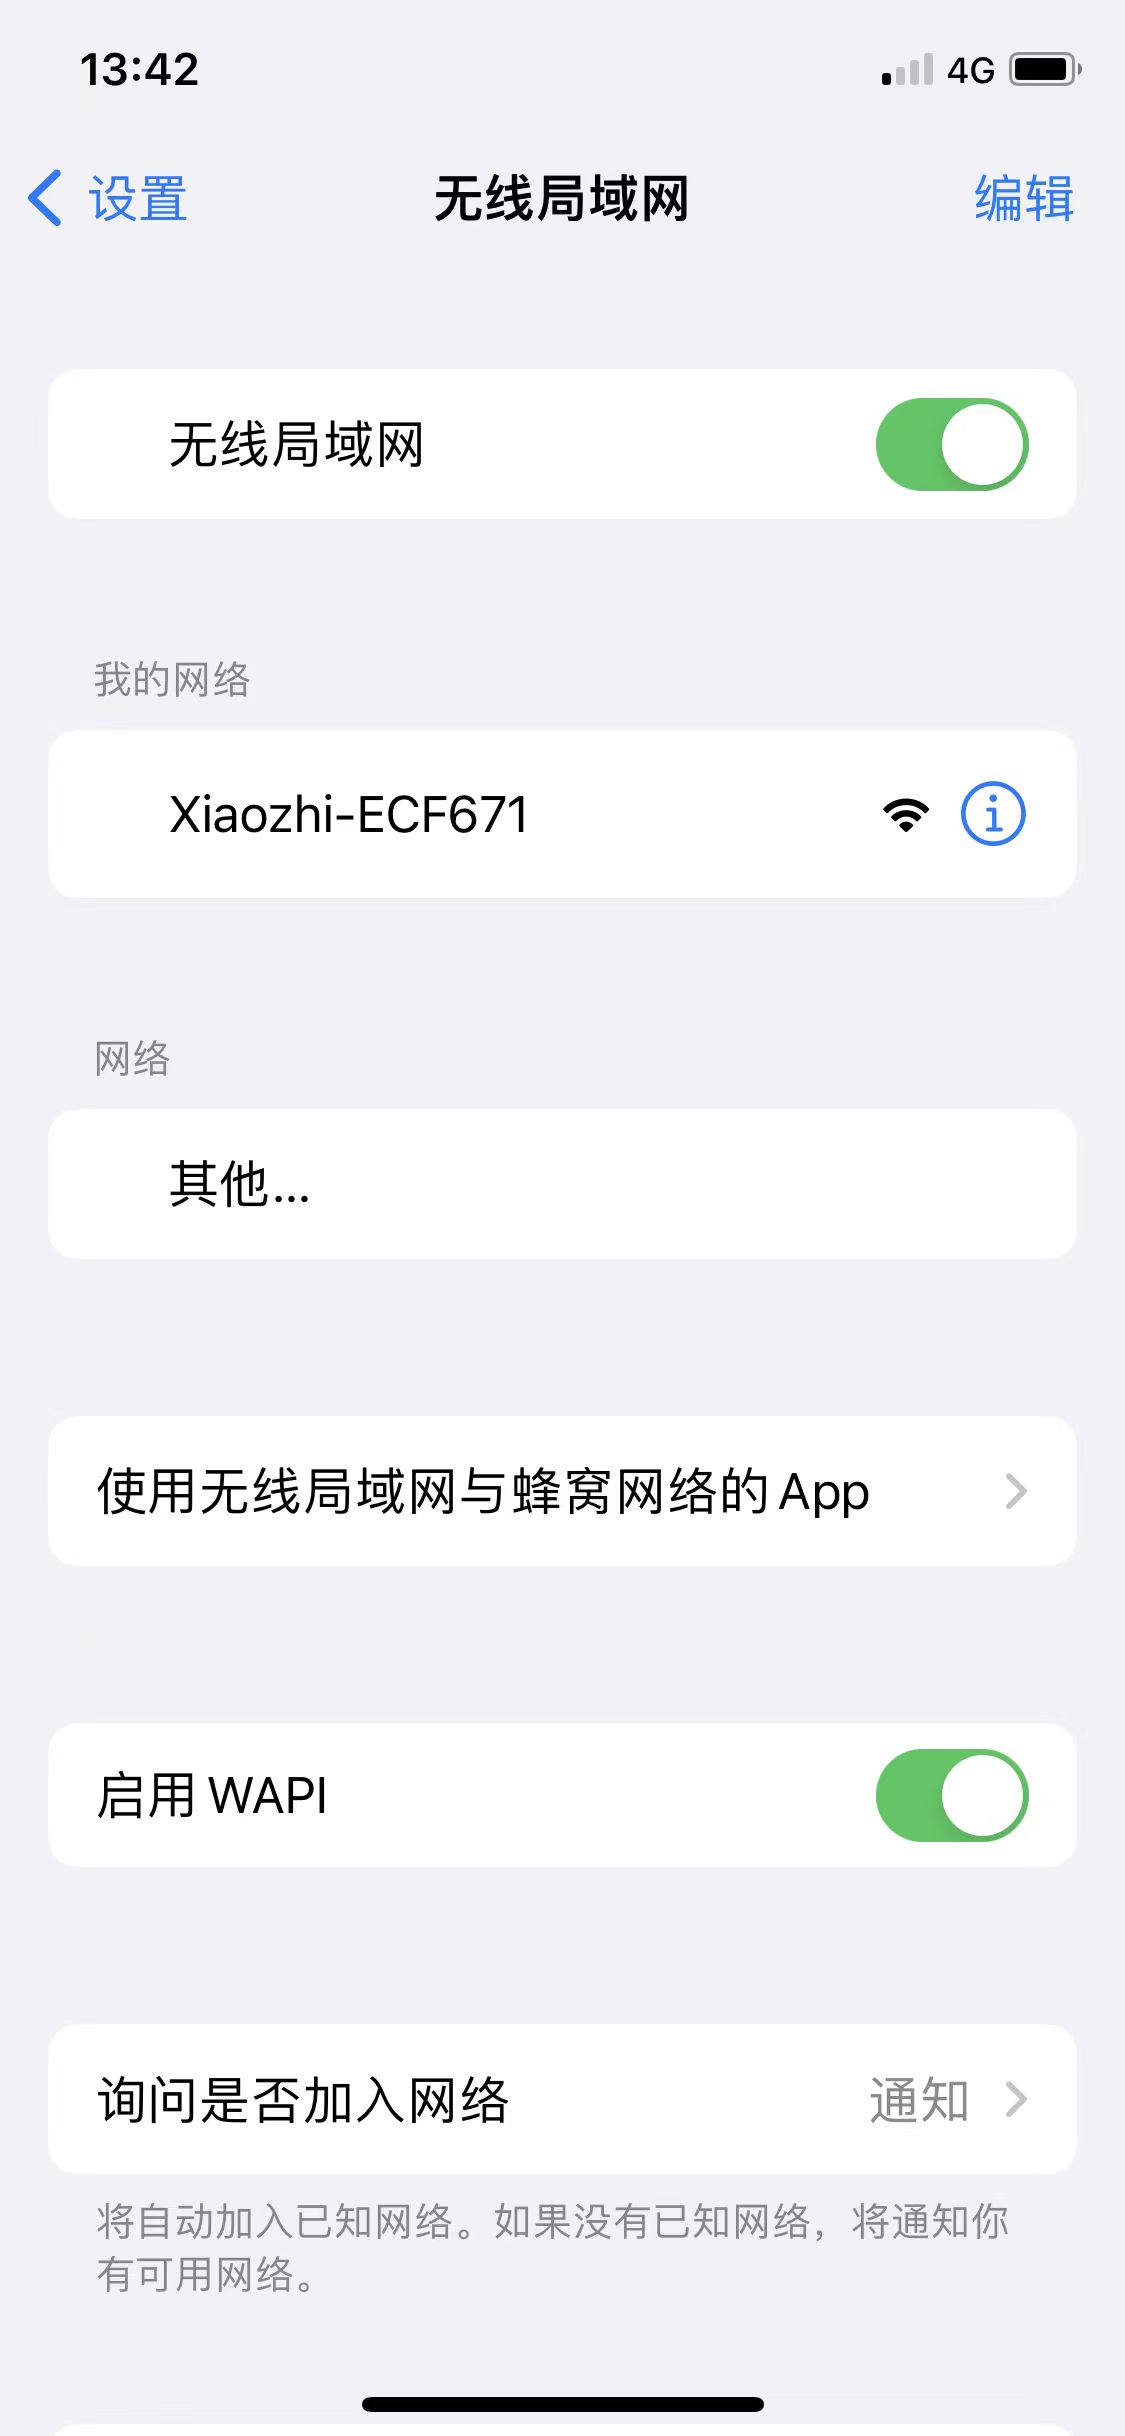
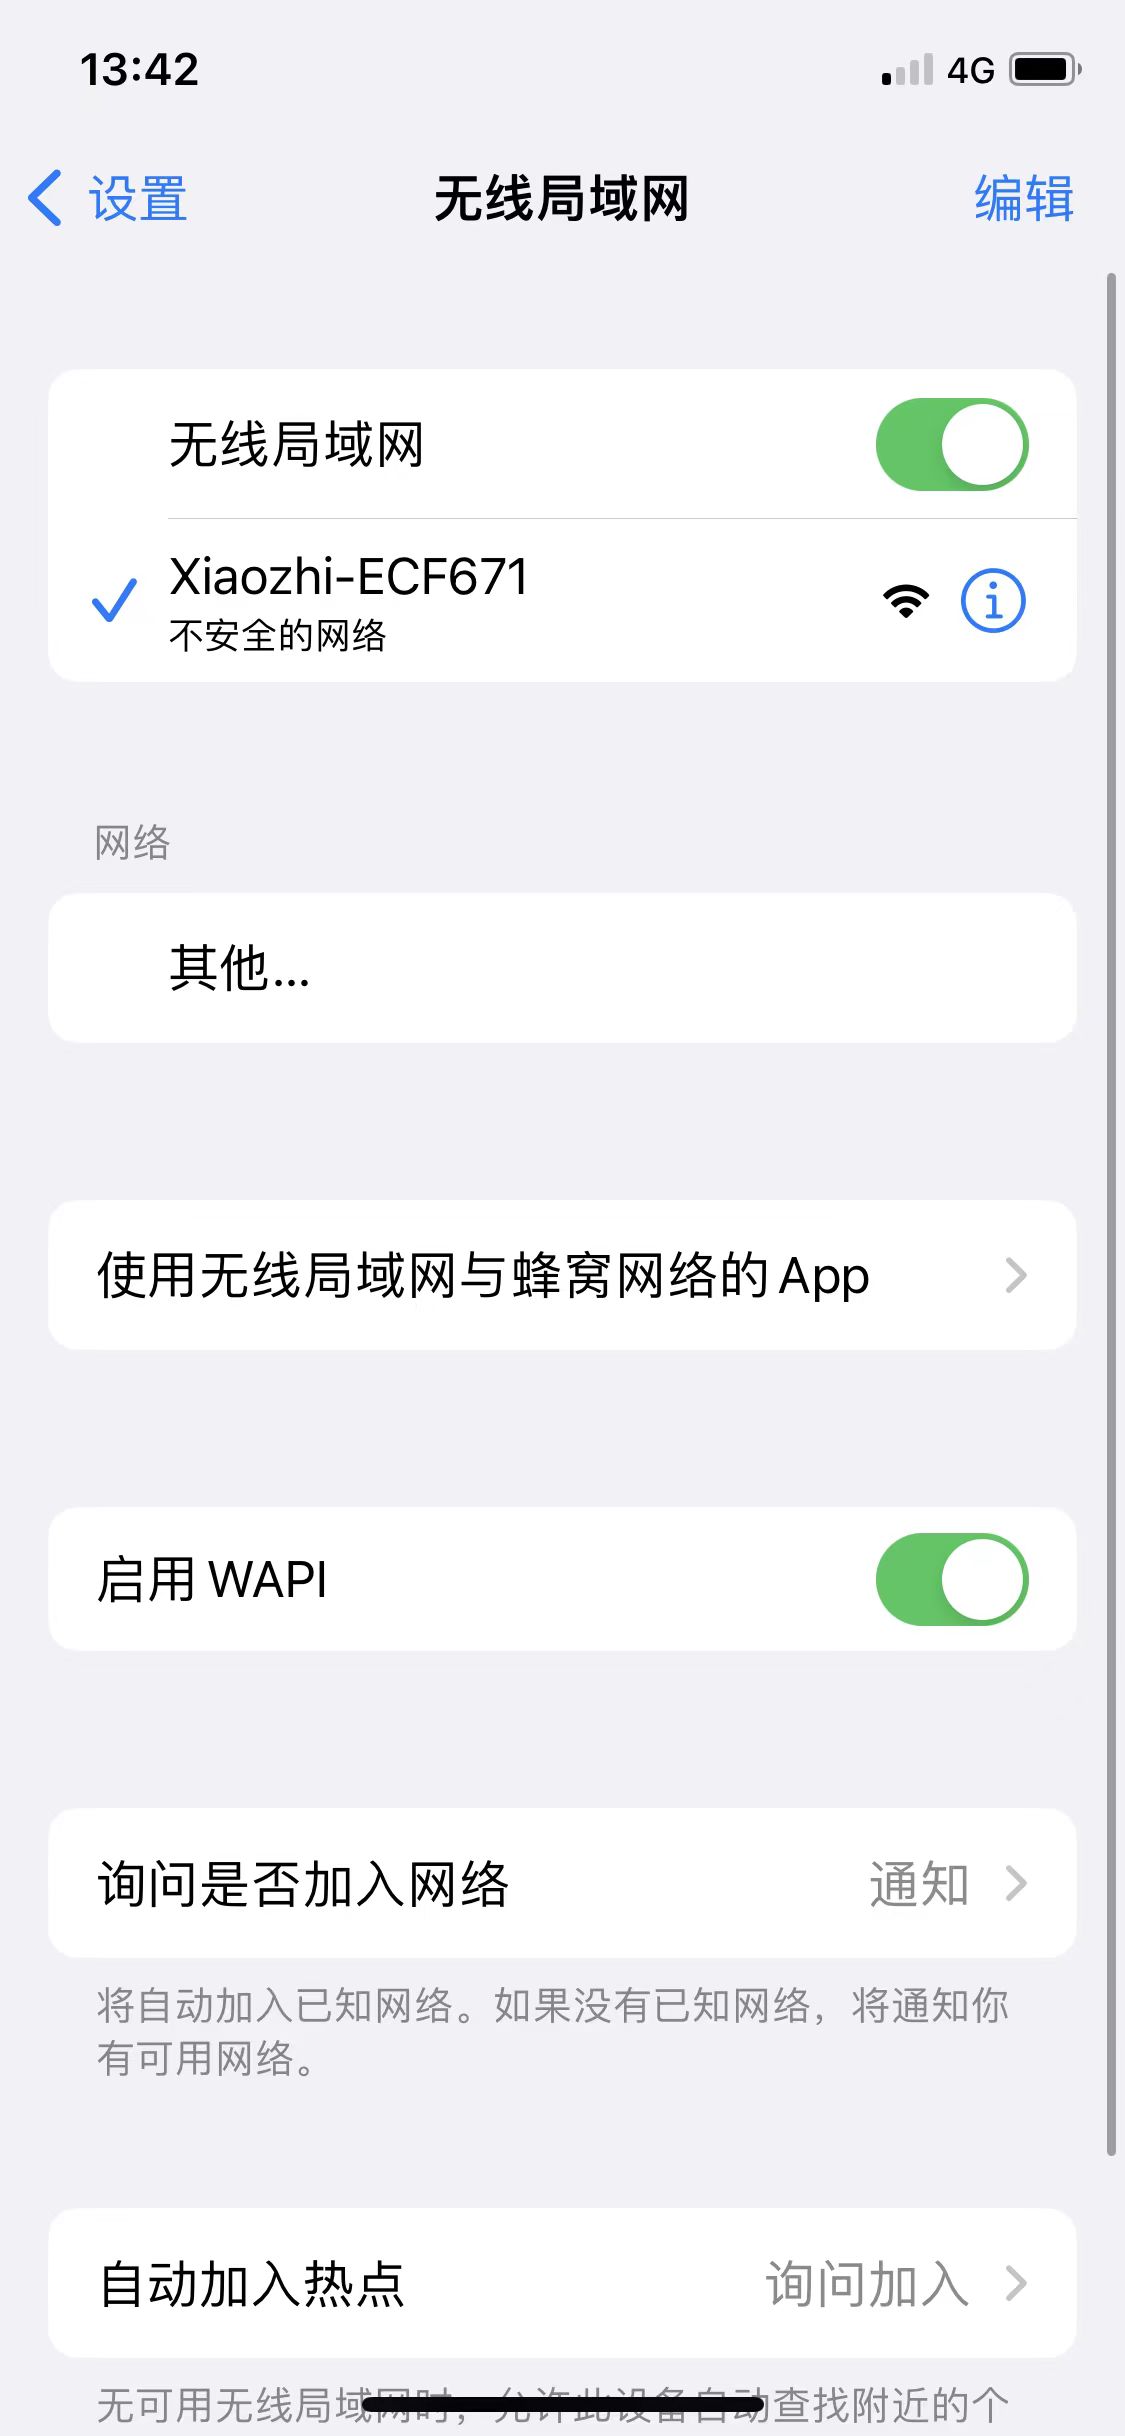
- Connect to the Xiaozhi-XXXX Hotspot
Using your phone or computer, connect to the device's WiFi network (named Xiaozhi-XXXX). Select and connect to it. Wait a few seconds for the connection to establish. A configuration interface will open automatically.
Note:
If the browser doesn't automatically open to http://192.168.4.1, make sure you're still connected to the Xiaozhi-XXXX network and manually enter http://192.168.4.1 in your browser.
- Select and Configure WiFi
From the list of scanned 2.4G networks, select your home or office WiFi network. The SSID will be filled automatically.
Enter the password for the selected network and click Connect to submit (passwords saved on your phone may be auto-filled).
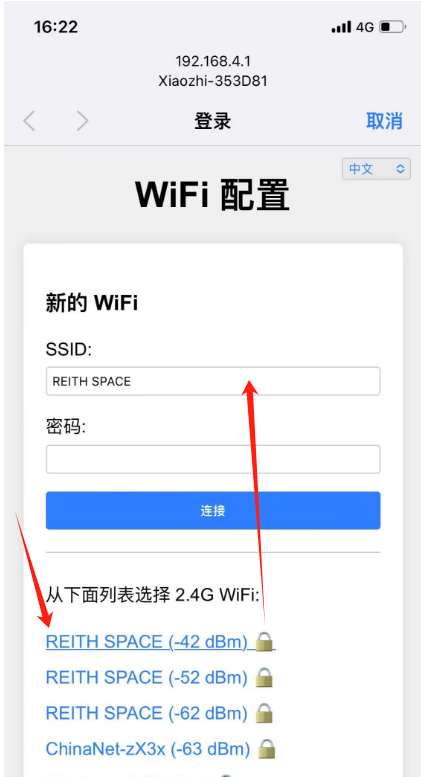
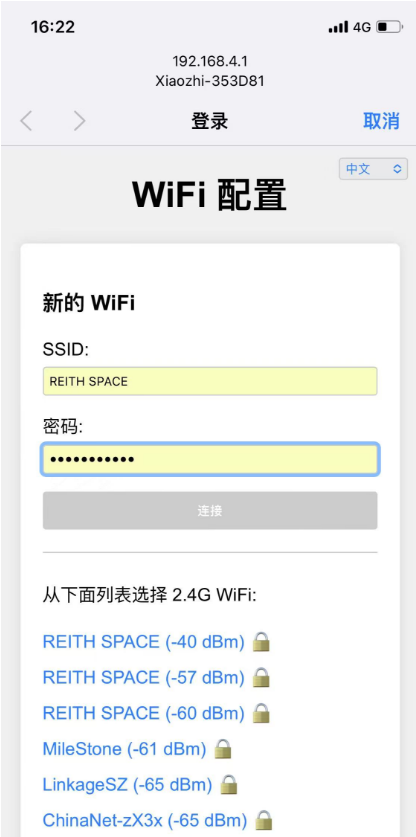
Note: The WiFi scanning page may take about 5 seconds to load. Please don't close the page.
- Connect and Restart
On the network configuration page, select your WiFi name (2.4G only; iPhone hotspot users should enable "Maximum Compatibility"), enter the password, and click Connect.
If the credentials are correct, the device will connect to the WiFi network and show a successful login message. It will automatically restart after 3 seconds.
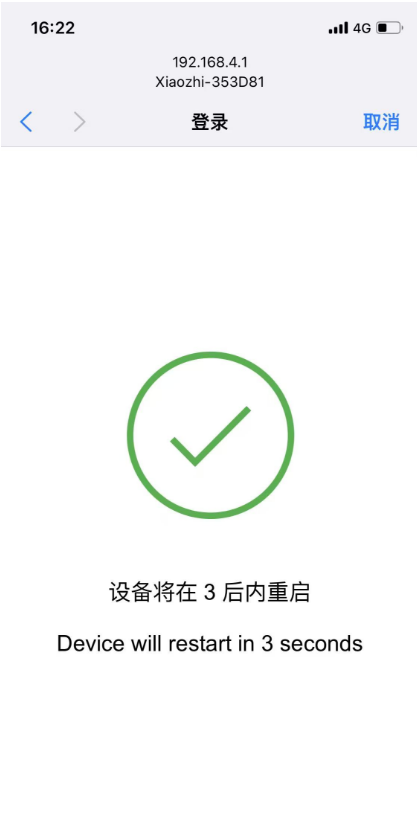
After restarting, the device will automatically connect to the configured WiFi network.
If the configuration fails, please verify your WiFi name and password, then try again.
Talk to the Bot
After the device connects to the WiFi network, you can now chat with the bot. Wake up the bot by saying "你好小智", or press the button on the right.